Explore forearm stand with these preparatory postures using a wall. Try them in order, mastering the previous variation before moving on to the next. Remember, this practice is not about the end goal, it's about what you discover along the way. Notice if your breathing becomes irregular and let that be your indicator to back off. Recognize if your ego is pressuring you to catapult into an inversion before you're ready and choose to spend more time building strength and flexibility first. Like all good things in life, your inversion practice takes dedication, discipline and consistency. Practice every day and enjoy the journey!
First, stretch and strengthen your shoulders by completing the exercises from week one.
Then, activate your core strength by practicing the postures from week two.
Once you're warmed up, find a wall.


Start facing the wall with your feet together. Place your palms + forearms on the wall so your elbows are in line with your hips and let your head hang. Notice how gravity makes your chest extend toward the ground and use abdominal strength to hug your bottom ribs in, creating a neutral spine. If your elbows begin to glide apart, practice squeezing them alongside your ears and remain here.
If you find the alignment from your elbows to your hips, then extend one leg back to complete the line from your elbows to lifted heel. Check-in with your ribs again and press the wall away with your forearms. Hold for five breaths and then repeat with the other leg.
Now flip it!


If you were able to breathe with ease during the previous variation, you're ready to put more weight onto your arms.
Start facing away from the wall on all fours. With your feet flat on the wall, stack your knees under your hips and elbows under your shoulders so all your joints make right-angles. Scoop your shoulder blades down your back and wrap the outer arms toward your thighs, then hug your bottom ribs in. Now lengthen your legs by pressing your feet into the baseboard. Walk your feet up the wall and extend your legs until you feel your hips hovering above your elbows. Squeeze an imaginary block between your thighs; eventually it feels as if one leg can support the other, creating ease and balance. Hold this shape for five breaths and train your body to recognize when all your joints are stacked.
Once you've found lightness, explore extending one leg toward the ceiling. Try to look at your toes to see that your heel is in line with your hip. Keep your toes from opening to the side by internally rotating the thigh bone. Lastly, press through your heel like you want to stand on the ceiling. This will help to resist the down + out force of gravity. Hold for 5 breaths and repeat with the other leg.
Stacking your bones is challenging, especially if you have tight shoulders. You can still practice forearm stand without open shoulders, but it's going to take a lot of strength. Yoga teaches us to use our energy efficiently, so continue working on your shoulder flexibility until you can breathe easily in this variation before moving on to the next.
Turn it around, upside down!
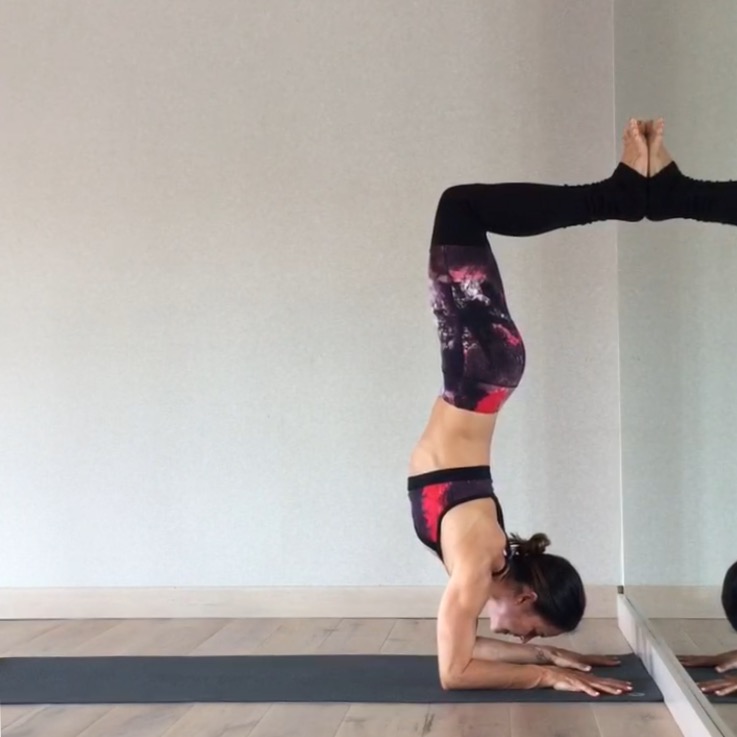
Start on all fours with your fingertips near the wall. The distance between your elbows and the wall should match the length of your shins. Again, scoop your shoulder blades down your back and wrap the outer arms toward your thighs, then hug your bottom ribs in. Extend your legs into dolphin pose and walk your toes as close to your elbows as you can, without jeopardizing the integrity of your shoulders. Press your chest toward your thighs and continue to look at your hands.
Lift your dominant leg and press out through the heel. Feel your hamstring activate to pulse your heel closer to the wall. Bounce off the ground with your supporting leg and bend the knee as if you're kicking your seat. This way, your leg won't hold you back as you leave the ground! Once you find the wall, bend your knees to place your feet flat on the wall. Curl your tailbone towards your knees and hug your thighs together. Hold for five breaths.
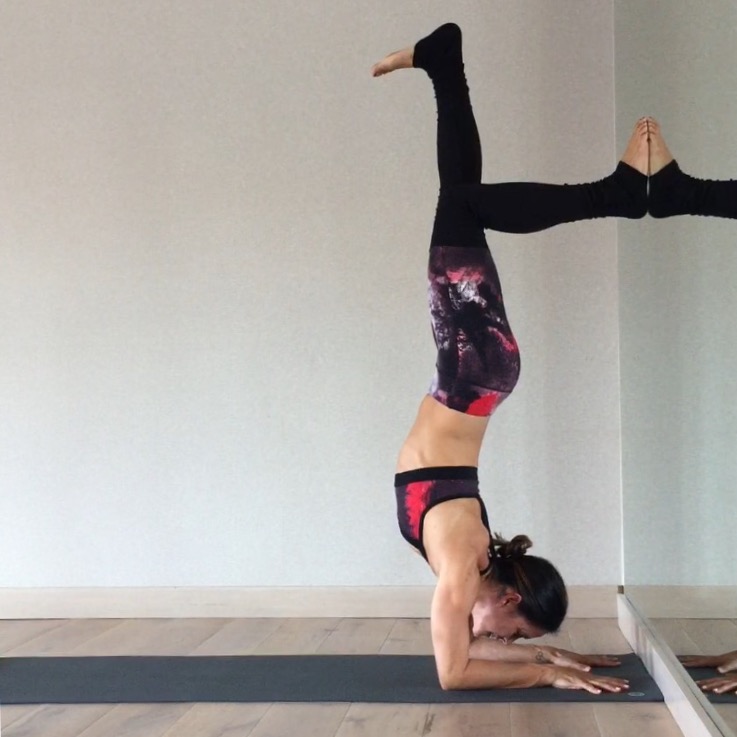
Only when you're able to breathe with ease, try extending one leg toward the ceiling while still squeezing and imaginary block between your thighs. Hold for five breaths then try the other leg. After five breaths, try both!
If your head touches the ground, use your tools:


A strap wrapped around your upper arms will keep them from sliding apart. Check the size of your loop by extending your arms in line with your shoulders. If you press into the sides of the strap and your hands end up wider then your shoulders, take it in a pinch.
The block works similarly, but instead of pressing out into the strap you'll press in to the block. This trains the appropriate muscles you need to keep elbows in line. Place your hands flat on the floor and press your thumb and index fingers into corners of the block. Note: to match the width of your shoulders you may need two blocks side by side; make sure the distance between your palms match your elbows and shoulders.
Manduka sells high quality props, contact me if you want 20% off!
I'd love to hear your feedback!
Was this helpful? Please leave a comment to share your experience along our quest for forearms stand.
xo,
Arielle